The Self-Capture Upload Portal can be accessed here.
Logging In
Your Siteaware login credentials will be used to access the portal.
All project team members who will be part of the Self-Capture process must be assigned as Self-Capture Specialists in the Project Permissions section of the Siteaware Platform.
Project Selection Page
After logging in, users will be taken to the Project Selection Page, where they will see all of the projects for which they have been assigned as a "self-capture specialist".
Clicking on Core Scan Data will take the user to the scan data page where they can navigate through the hierarchy to choose the scan for which they wish to upload data.
The first time that data is uploaded for a building, the user may be asked to select the capture method.
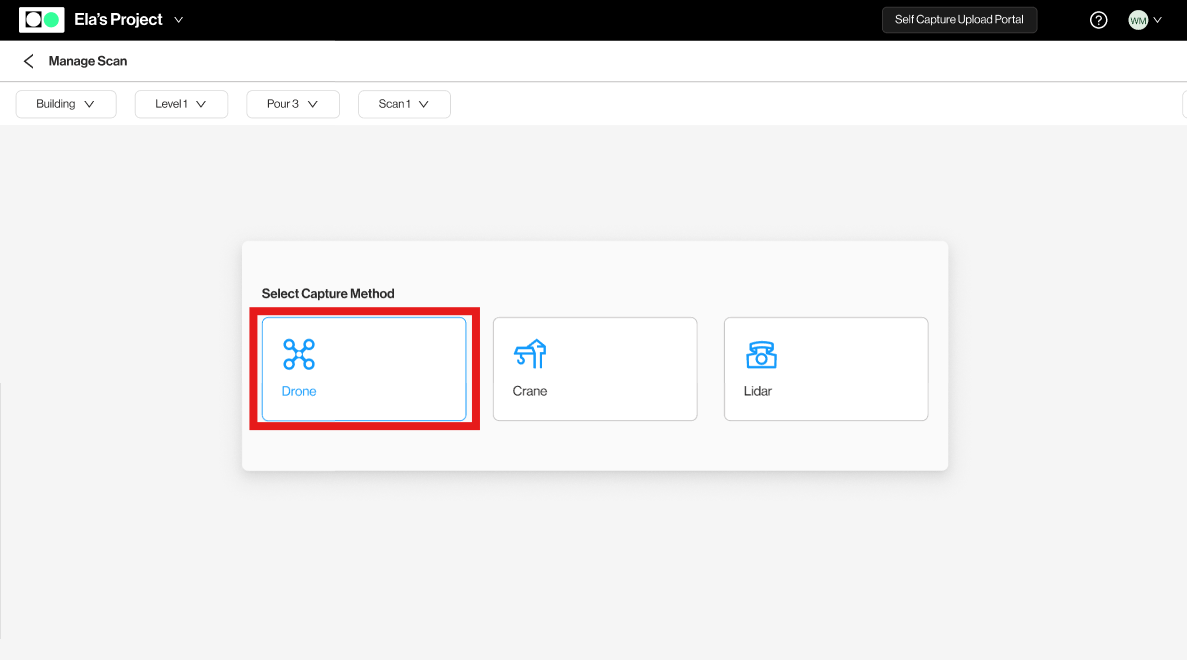
If your project changes capture methods mid-project, the capture method can be changed from the dropdown underneath your avatar:
Users will then see three tables:
GCP
When clicking Choose File a pop-up will open. Clicking Choose File will open the file browser allowing the user to select the GCP file(s).
Acceptable Formats: .xls, .csv, .png, .jpg, .jpeg, .txt
The user will be asked to choose a measurement type and coordinate system
Measurement Type Definitions:
Total Station- The points were measured with a Total Station.
RTK - The points were measured with a GPS-based measuring tool.
Gridlines - The points were placed at a designated offset fro.m the control grids (i.e. 1’ x 1’ SE off of Col A1).
Unknown - It is unknown how the coordinates were measured.
Coordinate System Definitions:
Local - The points were measured in a project-specific coordinate system (i.e. Based on A1 being 1000,1000)
Global - The points were measured in a WGS coordinate system (Coordinates will be similar to 7255917.330,2542665.775)
Unknown - It is unknown what coordinate system was used to measure the coordinates.
After the upload is complete, the files will appear in the table.
Raw Scan Images
To upload images, select Choose File
Users can then select the scan data to be uploaded.
Please Note: No coverage map will be produced when uploading via the Upload Portal
Once the upload is complete users will see their scan data in the table
Users can then either download or delete
individual files.
If the user wishes to download or delete multiple files, they can use the bulk action buttons that will appear when selecting more than one file.
360 Panoramas
After clicking Choose Folder a pop-up will appear allowing the user to choose the panorama folders they wish to upload.
After the upload is complete, each panorama will appear as a .zip file in the table.